The goal was to create a secure, hidden network file share for automated scheduled backups,
eliminating the need for manual PC backups with external hard drives. This upgrade would
significantly reduce time and stress for the IT department.
After doing some research, I began this project by setting up an unused server machine that
was purchased by a past
administration. This machine came preloaded with Windows Server, so I set up an
Administrator account with the password [redacted] and ran all the available updates for
the system. Then, under server roles, I added “File and Storage Services” which provided me
with the appropriate tools to create a network share. You can add the role via the Server
Manager or by using the following powershell command: Install-WindowsFeature
-Name FS-FileServer -IncludeAllSubFeature -IncludeManagementTools.
I installed a new
4TB NAS hard drive, activated it in BIOS, and cleaned it in Windows. I then created a new
NTFS volume, named it "Backups Primary," and assigned it the drive letter B:. With the
backup location set, I made it accessible on the network using the New Share Wizard under
File and Storage Services. I created and selected the directory B:\Shares\Backups to be
shared. To access this drive over the network, Administrator's credentials are required. I
also enabled “Access-based enumeration” to hide the directory from unauthorized users. After
completing the wizard, we are finally ready to start creating backups. You can test if the
drive is available over the network by going to any other network-connected PC and directing
File Explorer to the share: \\$ServerName\Backups and you should be prompted to
enter the Admin credentials.
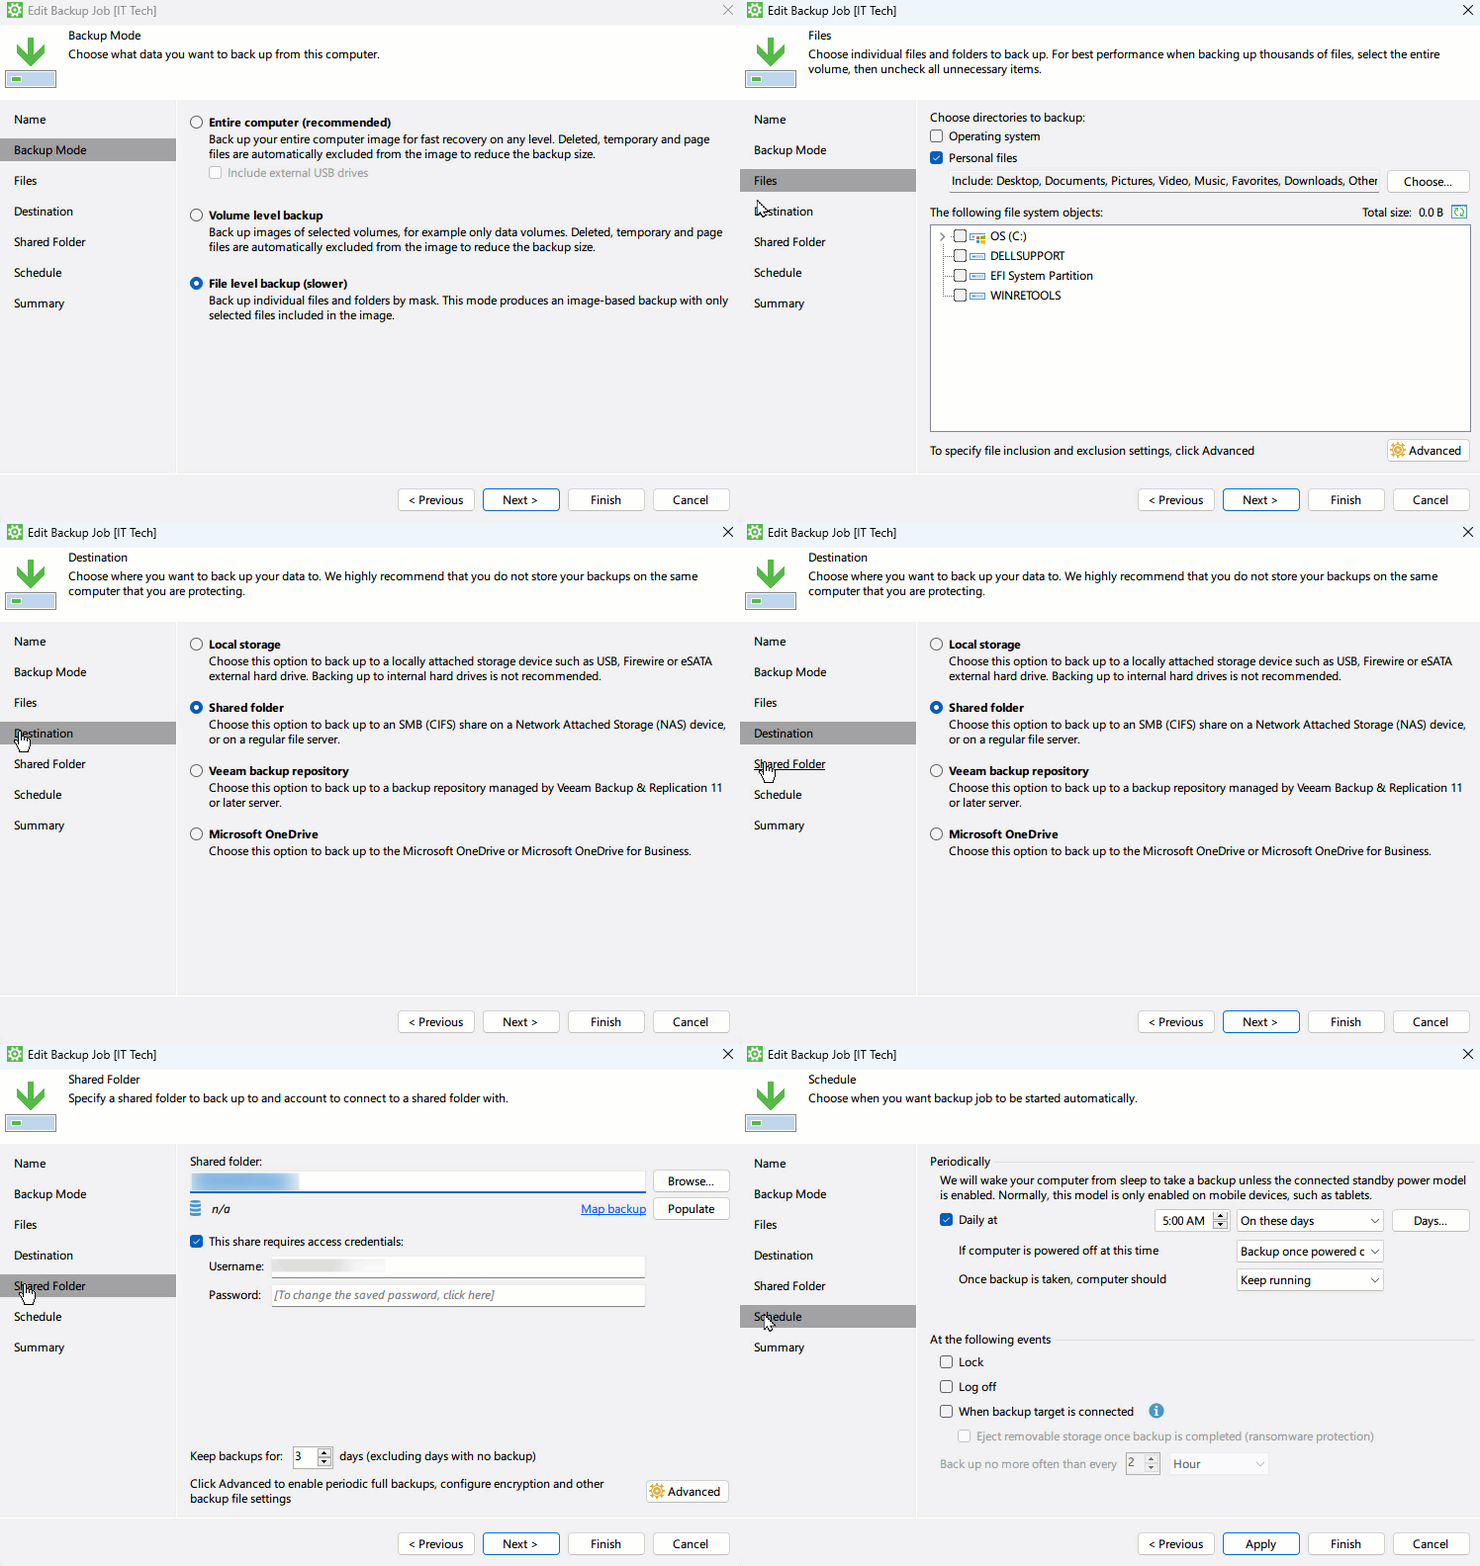
To automate the backup process, I used Veeam Agent for
Windows Community Edition. This free program, which allows one backup job per client
PC, is suitable for our needs. I installed the program on each client PC. Then, right-click
the system tray icon, and select Configure Backup.
Name the job and choose File level backup. Select the directories to sync, starting with
"Personal files." Set the destination to our shared folder using the server Administrator’s
credentials. Encrypt each backup job by clicking Advanced and setting a password
([redacted]). Schedule the backup and apply the settings.
If the installation is successful, the agents will save backup files to the network drive.
To restore, perform a one-time restore via the agent or open a backup file on the server
using Veeam Backup and Restore Community Edition. At this point the job is complete!
